Let Red Velvet season begin!
Red Velvet is today’s culinary “it” girl. Dozens of dedicated Pinterest boards, devoted red velvet enthusiasts, concoctions of all forms. I think Red Velvet, the old southern favorite, is at top of its bell curve. If you aren’t a fan, you may be rolling your eyes at every pancake recipe or cake pop. But, if you are like me, you are relishing in the light of its fame. I’m no fair-weather fan – I pledged my love years ago and I will be faithful when Red Velvet tips over the top of this roller coaster and lands on the “out” lists.
I used to recognize Valentine’s Day as the commercial holiday it is. As a kid, I enjoyed candy hearts as much as the next sugar fiend but as I matured, I never required my love interests to make a big deal of the holiday. However, sixteen years ago, I met my husband on Valentine’s Day and the day took on a more real meaning.
Fourteen years later, our second daughter (lovingly known as Baby Whipped) was born on Valentine’s Day. This year, as she approaches her second birthday, I’ve got the Valentine’s fever. Hearts, candies, gifts, special dinners, sappy sentiments… BRING it on. My heart is bursting.
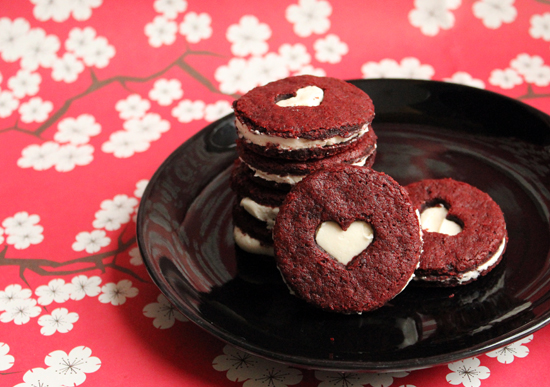
This year, we decided to try a new Red Velvet recipe. These sandwich cookies were chosen in part so I could employ my favorite Linzer cookie cutter. The method of spreading out the batter is a little fussy. But, we loved the flavor of the cookies and the consistency. For almost a week, they lived on our counter in an air tight container and stayed soft.
If time allows, I’ve got my eye on these mini cheesecakes, red velvet waffles with cream cheese glaze, and red velvet doughnuts. Though I thought my love for red velvet knew no bounds, I must admit that even I feel THIS may be going too far.

Red Velvet Sandwich Cookies
1 cup All Purpose Flour
2 tablespoon Cocoa Powder
3/4 cup Sugar
1/2 teaspoon Baking Powder
1/4 teaspoon Salt
1/2 cup Unsalted Butter, at Room Temperature
3 tablespoon Milk
1 tablespoon Red Food Coloring
1 tablespoon Apple Cider Vinegar
1 teaspoon Baking Soda
2-inch Round Cookie Cutter
For the Cream Filling:
1/2 cup Shortening
1/2 cup Butter
2 cups Confectioners Sugar
2 teaspoons Pure Vanilla Extract
Directions:
Preheat oven to 350 degrees.
In the bowl of a stand mixer, whisk together the flour, cocoa powder, sugar, baking powder, and salt. Add the butter and milk and beat until incorporated. Mix in the red food coloring. Combine the vinegar and baking soda in a small bowl, and then mix into the batter.
Transfer the batter to a sheet pan lined with a silicone mat or parchment paper. Using an offset spatula spread the batter until it reaches the edges of the pan and has evened out.Bake the large cookie until it has set, about 12-14 minutes. The edges make be crunchy but the center will spring back to your touch. Remove from the oven and let cool until its warm.
While the cookie is cooling, make the cream filling. In the bowl of a stand mixer, beat together the shortening and butter. Add the confectioners sugar and beat until smooth and fluffy, about 3 minutes. Mix in the vanilla.
Transfer the filling to a piping bag filled with a large round tip.
When the cookie is just slightly warm, carefully transfer the large cookie to a clean surface. Using a 2-inch round cookie cutter cut out the cookies leaving as little scraps as possible. Place the cookies in pairs, side-by-side. Pipe small rounds of cream filling on one cookie of each pair, top with the other cookie. Serve and enjoy!
These cookies last up to 6 days in a sealed container.

(The beautiful paper in the top photo is classic Snow & Graham cherry blossom wrapping paper.)