Shall we break bread together again? It’s been awhile. Welcome back to my virtual table.
I haven’t written on Whipped since pre-pandemic days. Many signs in my life have been guiding me back to this blog and the online community of home cooks, amateur mixologists, and virtual conversationalists. Like an old friend that has been absent too long, I am showing up with so much to say that I don’t really know where to start.
I’ve returned to you with fresh bread and the hope that we can reconnect and start our virtual conversation again. In the coming weeks, I’m vowing to post regularly sharing food, drink, and conversation. I hope you’ll join me.
Like millions of people around the world, I turned to bread baking last spring as a source of distraction and comfort during the early days of this pandemic. Though I’ve always enjoyed the methodical process of bread baking, my life as a mother and business owner was so busy, I was rarely home for enough consecutive hours to make bread.
My initial pandemic bread baking adventures were fueled by the shortage of flour and yeast. Scarcity drove me to find those ingredients and bake! When I finally discovered massive, food-service-sized bags of flour heaped 6 feet tall at Gordon Food Service, my hoarding instinct kicked in and I found myself with a strained back muscle and a trunk filled with seventy-five pounds of flour!
The surprising truth is that I used all of that flour! I gave away a number of small bags to friends and neighbors, but mostly I baked and baked and baked… I have an arsenal of perfected recipes and an extra ten pounds of padding on my body to prove it.
My bread exploration has been wide-ranging. After perfecting a sandwich loaf and these baguettes to my liking, I jumped on the sourdough craze and enjoyed the nuances of caring for a starter and coaxing just a few simple ingredients into a beautiful loaf over a number of days.
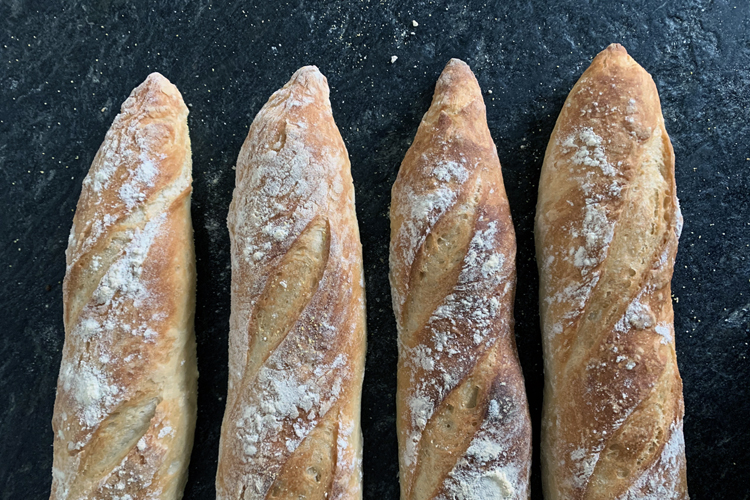
The first bread recipe I am sharing with you is this 4-hour baguette recipe. It is one of the easiest, quickest bread recipes and French bread is an ideal canvas for SO many sweet and savory toppings. For those who have made baguettes before, I’m certain that there is more than one way to make a delicious, crunchy-crusted loaf. I experimented with a number of recipes and methods, finally landing on this one. I’ve documented the steps below with photos and tips so that even bread baking beginners can find success.
In the case of bread making, photos certainly do help others understand techniques. The feel of the dough is also essential to know if you are on the right track. I’ve done my best to describe everything to you. But, since the temperature, humidity, and equipment in your kitchen can all make a difference, it may take some practice to get your bread just the way you like it.
Though I find this baguette recipe and method the easiest to follow while producing the most consistent loaves, I temper your expectations by admitting that nothing is quite like the baguettes found in France. I have yet to taste a “true baguette” in the United States because the flour and ovens in France are different than they are here. And, it is possible that a baker speaking French while baking the bread adds a little “je ne sais quoi” to its deliciousness.
Because this recipe yields bread so quickly, there is less time for flavor development. Baguette recipes that let the dough rest overnight will be
You can cut this baguette recipe in half, but I never do. I either freeze some bread or better yet, give a warm loaf to a neighbor or friend. Almost no offering is better received than a warm loaf of bread.
Enough conversation for now. I welcome you back to Whipped, I thank you for visiting my blog.
Tips, Tricks, and Photos: How to make No Knead Baguettes:
I’ve found that a kitchen scale is extremely helpful to make consistent bread. I’ve included both measurements in grams and traditional American cups and teaspoon equivalents.
Since most basic bread has the same simple ingredients, flour, salt, yeast, and water, the technique is very important. Bread baking isn’t made for a lot of improvisation.
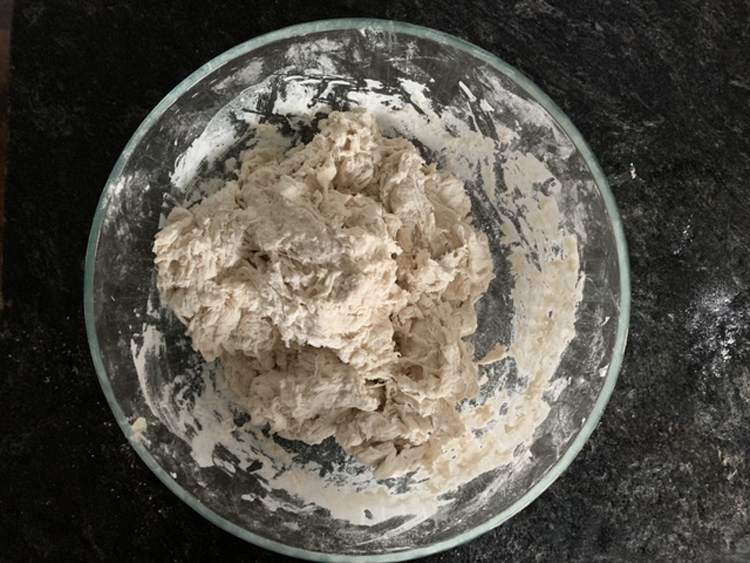
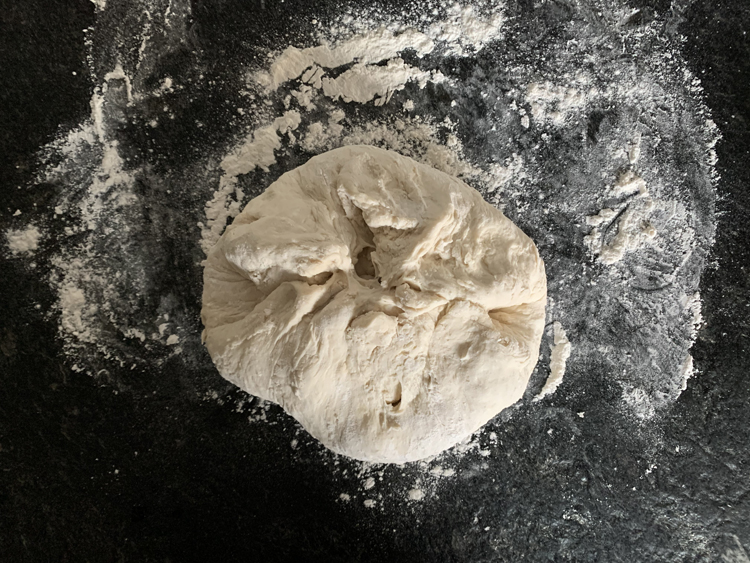
When you first mix the flour, water, and yeast, I suggest using a wooden spoon or your hand! The mixture will be very shaggy. However, when you pinch it, it shouldn’t feel too sticky. You should NOT have any loose flour left at the bottom of the bowl after mixing for about a minute.
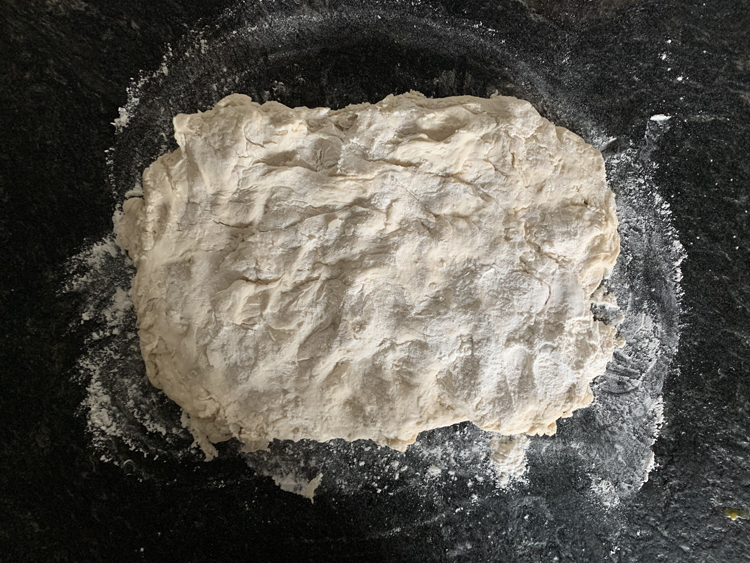
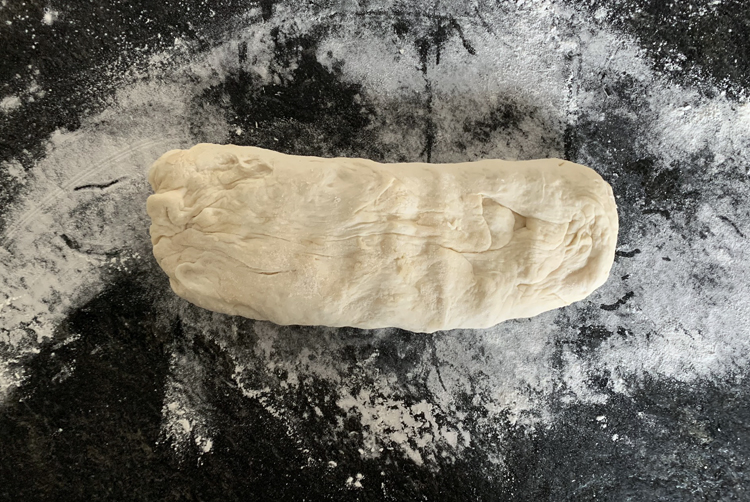
Cover the bowl with plastic wrap and let it rest for 30 minutes. When you remove it from the bowl, turn out the dough onto a lightly floured surface. Press it into a rectangle about 12 x
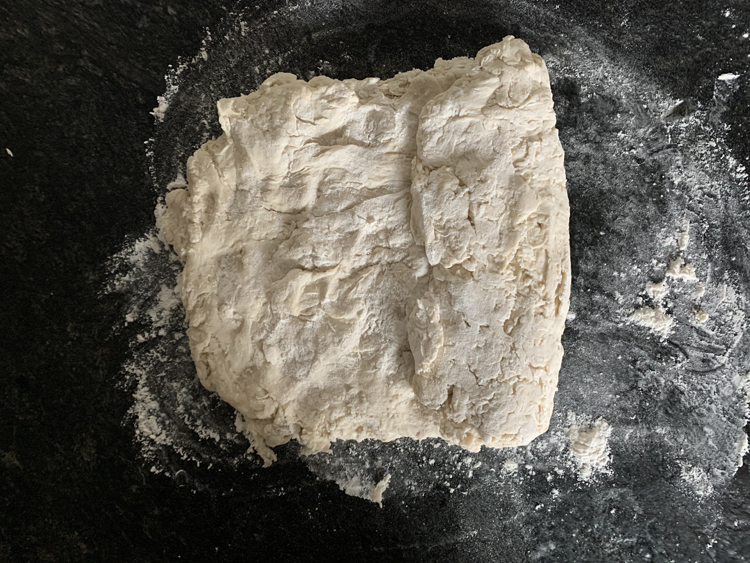
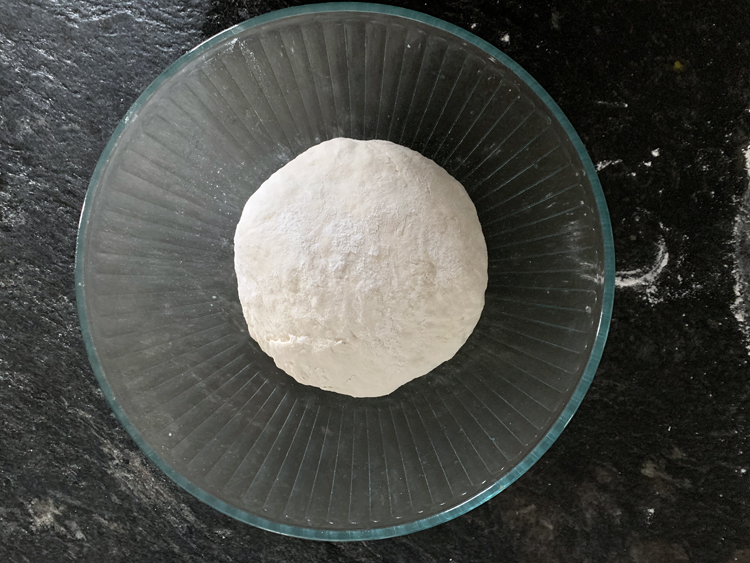
Prepare a greased bowl by lightly rubbing the inside with oil or spraying with cooking spray. Gather the sides together to make a rough round. Pick up the dough and put it seam side down into the bowl.
Cover with plastic wrap and set in a warm place to rise. When it is really cold in the house, I sometimes turn on my oven and after a few minutes of
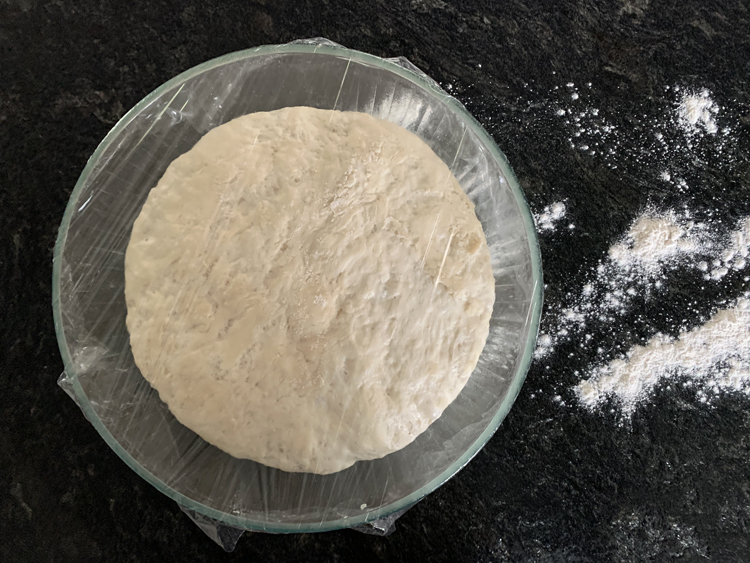
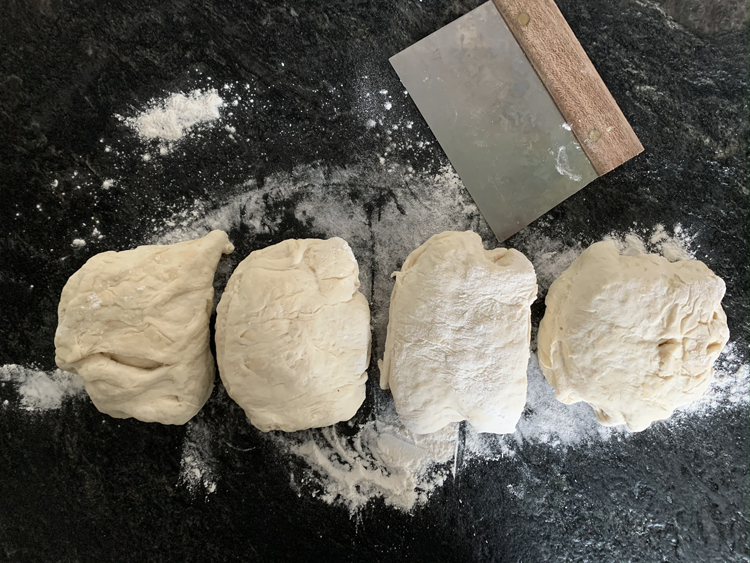
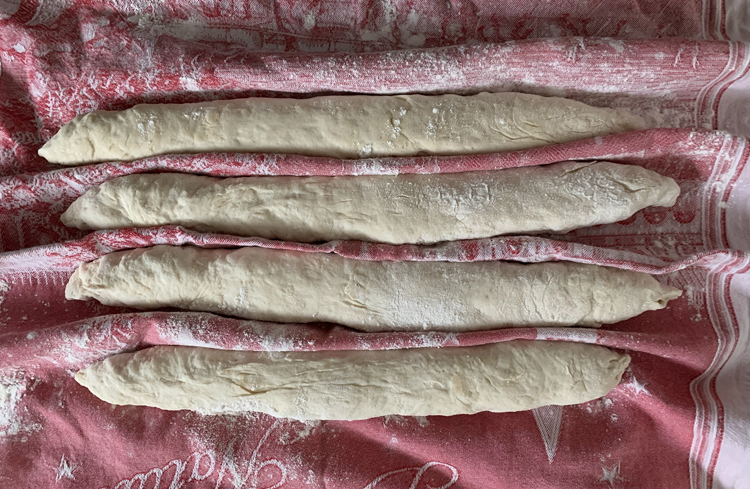
The dough should double in size within about 1 1/2 – 2 hours. (see photo above). Carefully turn the dough out onto a floured surface and use a pastry cutter or knife to divide it into four equal portions. I usually eyeball it as I like loaves with a little individuality but you can also weigh your quarters to ensure identical size.
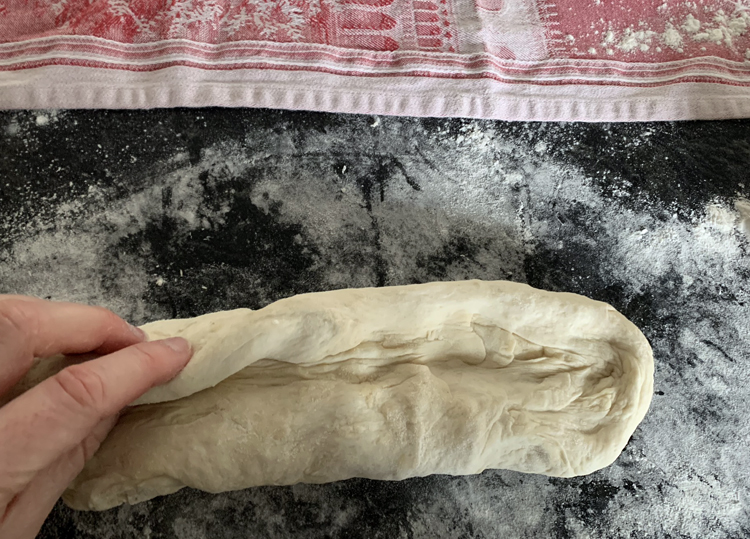
Shaping the loaves is a bit tricky and takes some practice. The key is to try to keep all of the air that has formed inside the dough so handle it gently while coaxing it into shape.
Lightly press each piece into a rectangle about 6 inches by 2 inches long.
To elongate the loaf, work along the long side pinching the dough up and toward the center. Do the same for the bottom side, bringing the two sides together in the middle and pinching them together.
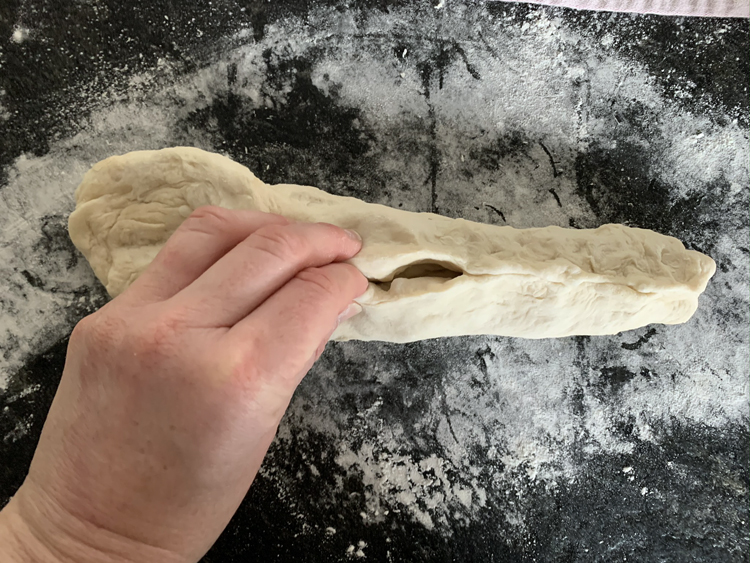
Repeat this technique a second time and a third if you still want the loaf longer and thinner.
After the second or third time, you have about an
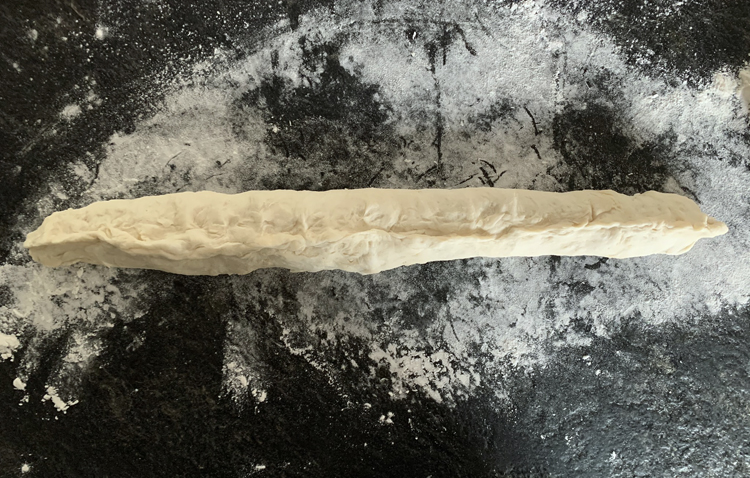
With flat, open hands, take the ends of your loaf between your palms and slightly roll it back and forth to create pointed ends if you like that look. I love the crunchy tip of the loaf with this technique!
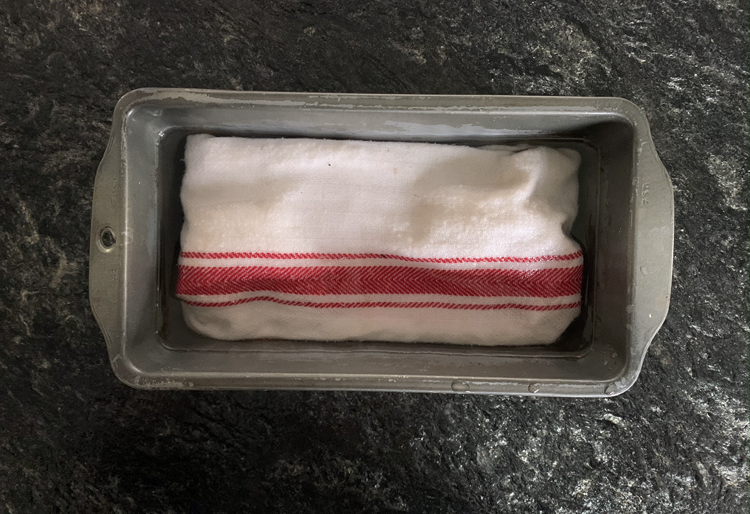
The second rise happens between what is called a
Place your loaves, seam side down, on your prepared towel, pulling up folds of fabric up between the loaves. Cover with plastic wrap and allow to rise again until doubled for 45-60 minutes.
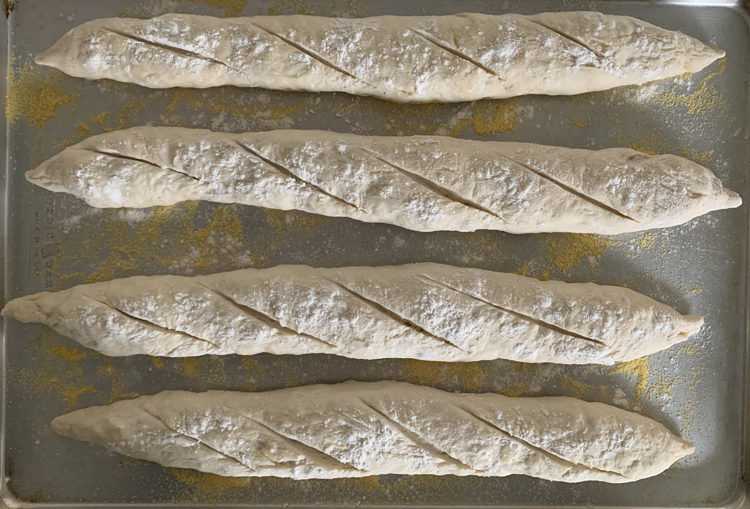
While waiting for the final rise, prepare for baking. It is essential to have steam in your oven to produce the crunchy, baguette crust. I’ve tried a variety of techniques including ice cubes
If you have a bread stone, put it in the oven on the middle rack as well while preheating. I usually bake these on an
When the loaves have risen, transfer them to your stone or your cookie sheet. Sprinkle flour down the top of the loaf. Using a lame (blade) or a very sharp knife, slash the loaves a number of times in a slightly angled, vertical pattern.
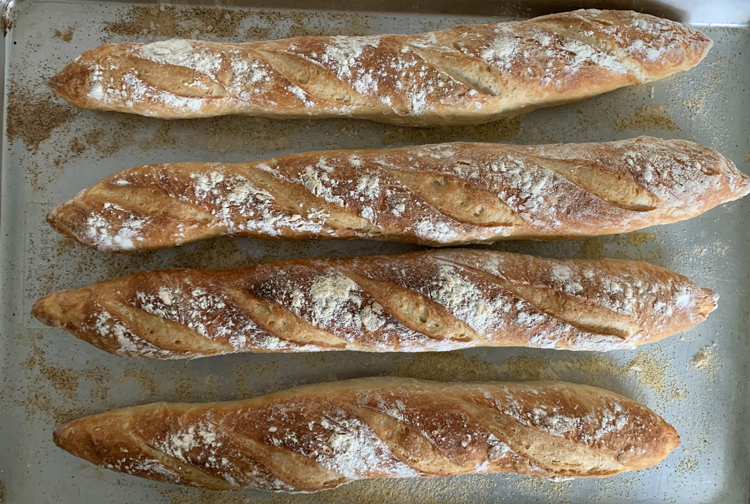
Put the loaves in the
Let them cool slightly, but by all means tear off a chunk and eat it while it’s warm!
The bread is best eaten within a day or two. I store loaves in ziplock bags at room temperature after the first day. If you want to “revive” a loaf that is a day or two old, get your hands wet and rub the outside of the bread to mak
Can you freeze this bread? Of co
Phew… seems like a LOT. But, I swear that once you are familiar with this recipe and technique, it is NOT hard. As long as you are home and have a little time for each of the steps, it doesn’t take much work.
Easy French Baguette Recipe in 4 hours
Makes 4 baguettes
Ingredients:
100g/ 1/2 cup warm water
8g/ 2 1/4 teaspoons active dry yeast
775g/ 5 1/4 cups bread flour
20g/ 3 teaspoons kosher salt
420g/ 1 3/4 cups cool water
Cornmeal, for baking
Equipment needed:
Mixing Bowl
Plastic Wrap
Wooden Spoon
Pastry Cutter or Sharp Knife
Linen Couche or Thin, non-terry Kitchen Towel
Baking Stone or Baking Sheets
Bread Pan or other for steam
Second Kitchen Towel
Lame, Razor, or Sharp Knife
Instructions:
1. Combine warm water (about 110 degrees) and yeast and let sit while measuring out other ingredients
2. Combine bread flour and salt in a bowl, mix together.
3. When yeast is foamy (about 10 minutes), make a well in the flour mixture and pour the yeast and water in it. Stir with a wooden spoon or your hand pulling the flour from the sides over the wet mixture to incorporate.
4. Pour the cool water (slightly colder than room temperature) a third at a time, mixing to incorporate with a wooden spoon or your hand. Mix until just incorporated and a shaggy mixture forms.
5. Cover the bowl with plastic wrap and let sit for 30 minutes.
6. Turn the dough onto a lightly floured work surface and press into a rectangle about 10 inches by 5 inches. Book fold the rectangle by bringing in each side to the center.
7. Lightly grease a bowl with oil or cooking spray. Pull
8. Cover with plastic wrap and let sit to rise until doubled in size (1.5 – 2 hours)
9. Carefully turn
10. Shape loaves using the technique mentioned above. Pinch top and then bottom sides together while elongating the loaf and making a seam of the two sides. Repeat
11. Place loaves, seam side down on a floured kitchen towel, pulling fabric up between loaves.
12. Cover with plastic wrap and let rise for an hour.
13. While loaves are rising, prepare water pan. Roll up a kitchen towel in a small bread loaf pan and fill with water. Place it on the bottom rack of the oven on the side.
14. Put one rack in the middle of the oven and if using a baking stone, put it on the middle rack.
15.
16. When loaves have risen, place them on a cookie sheet or the heated bread stone that is sprinkled with cornmeal.
17. Lightly sprinkle flour on each loaf. Using a lame or sharp knife, make four shallow scores into the loaf at a vertical angle.
18. Bake the bread for 35-45 minutes or until